
Data Source Expand Control
Data Source Expand Control

Data Source Edit Button

Step 1: Data Source Editable Fields

Next: Connect Button

Step 2: Data Source Editable Fields

Next: Review Button

Step 3: Data Source Impact Analysis

Next: Save Button

Save Button
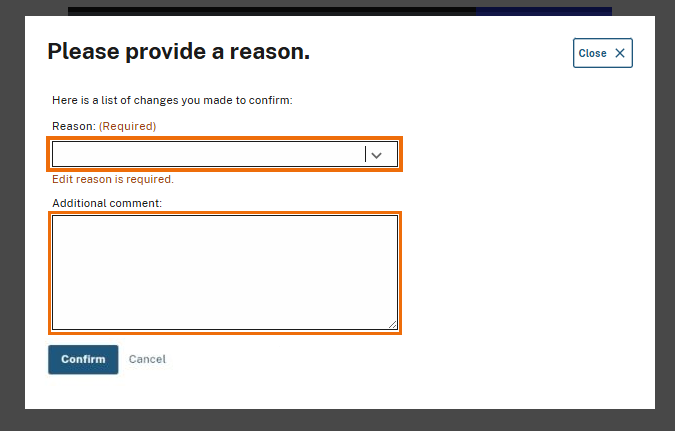
Data Source Reason Modal
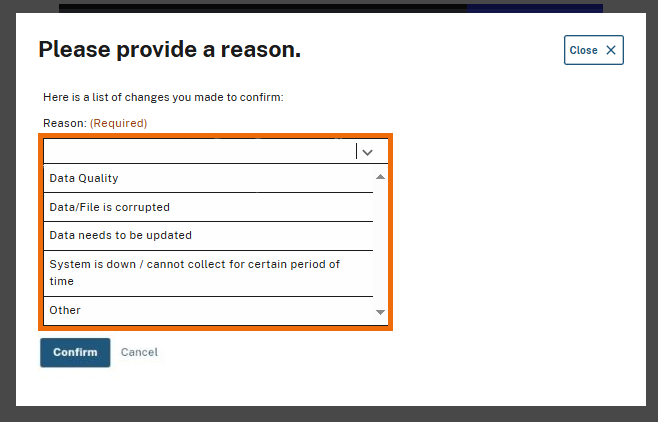
Reason Dropdown Field

Confirm Button